The Day the Sales Tech Met His Match
I followed a ‘Sales Tech’ last November who had just quoted a retired schoolteacher sixteen grand for a full furnace repair and a new split system. He told her the heat exchanger was ‘micro-fractured’—a classic lie—and that her upstairs bedroom being eighty degrees in July was a ‘lost cause’ without a total gut job. I walked in, saw the furnace was barely seven years old, and realized the upstairs was just a ductwork nightmare designed by someone who clearly didn’t understand static pressure. Instead of a new furnace, I sold her a high-efficiency mini-split for that upstairs zone. But here is the kicker: the Sales Tech would have just slapped the line set on the siding with some zip ties and tape. I spent the afternoon doing it right with a full line set cover system. Why? Because I am an HVAC technician, not a butcher. If you leave that copper and insulation exposed to the elements, you are not just an amateur; you are a thief stealing years of life from the compressor.
“The most expensive equipment in the world cannot overcome a bad duct system—or an unprotected line set exposed to the UV radiation of a relentless sun.” – Industry Axiom (Modified for the Field)
The Thermodynamic Zoom: Why Protection is Mandatory
We need to talk about what is actually happening inside those copper tubes. In a mini-split AC installation, your suction line (the big one) is carrying low-pressure vapor back to the compressor. If you are doing your job right, that line is ‘beer can cold.’ The moment you leave that black Armaflex insulation exposed to the sun, the UV rays begin to turn it into a brittle, crumbling mess. Once the insulation fails, the ambient heat starts bleeding into your refrigerant. This is called ‘parasitic heat gain.’ You are forcing your compressor to work harder to remove heat that wasn’t even in the house to begin with. In our Northeast climate, where we deal with the ‘Polar Vortex’ and ice buildup, exposed lines are even more vulnerable. When water gets into cracked insulation and freezes, it expands, potentially pinching the copper or creating vibration leaks. We are looking at a thermodynamic failure because of a fifty-dollar plastic cover.
The Regulatory Cliff: R-410A is Dying
Before we pick up a drill, you need to understand the shift. We are standing on the edge of the A2L transition. R-410A is being phased out for refrigerants like R-454B and R-32. These are ‘mildly flammable.’ This means the integrity of your line set is no longer just about efficiency; it is about safety. A leak in a poorly protected line set could, in a worst-case scenario, introduce a flammability risk near an ignition source. While these mini-splits are sealed systems, the way we protect the ‘gas’ (refrigerant) matters more than ever. If you are installing a unit today, you better be thinking about how that line set cover protects the system for the next twenty years, because a repair in 2030 is going to cost five times what it does now due to refrigerant taxes and specialized recovery requirements.
How to Install a Line Set Cover Like a Pro
1. The Layout and the ‘Pookie’ Factor
First, you don’t just start screwing things into the siding. You need to map the run from the wall penetration down to the condenser. I use a chalk line. If your run isn’t plumb, you look like a ‘tin knocker’ on his first day. Before the base goes on, I seal the wall penetration with ‘Pookie’ (mastic) or a high-grade silicone. You have to stop the air infiltration. A mini-split is designed to manage the latent heat (humidity) of a specific space. If you have a two-inch hole in the side of the house, you are basically trying to air condition the entire county. Seal it tight.
2. Mounting the Base
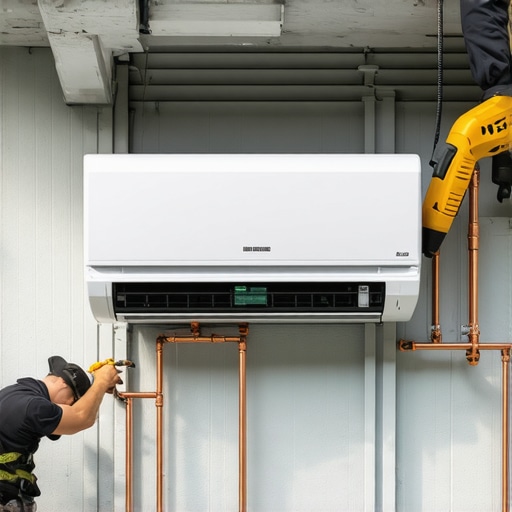
The line set cover system (like Slimduct or Fortress) consists of a backer and a snap-on front. Screw the backer into the studs—not just the siding. Use stainless steel screws because the ‘Sparky’ (electrician) isn’t the only one who has to worry about rust. If you are mounting on masonry, use Tapcons. Space your fasteners every 18 to 24 inches. If you skip this, the plastic will warp when the sun hits it, and the covers will pop off like a cheap hubcap.
3. Bending the Copper Without the Kink
This is where the ‘Sales Techs’ fail. They try to manhandle the copper into the 90-degree elbows of the cover. Use a tube bender or an internal spring bender. If you kink that suction line even slightly, you have created a permanent pressure drop. That pressure drop will cause the evaporator coil to starve, your superheat will go through the roof, and your compressor will be dead in three summers. Lay the liquid line and the suction line into the channel, ensuring they are properly insulated and separated where possible to prevent thermal ‘slugging.’
4. Managing the Condensate
In a mini-split, the drain line usually lives in the same cover. In a cold climate like Chicago or New York, you need to ensure that drain line has a consistent pitch. If there is a dip in the line set cover, water will trap, freeze, and then back up into the indoor head, ruining the customer’s drywall. I always run the drain line at the very bottom of the cover to keep it as far from the cold refrigerant lines as possible.
5. Snapping the Caps
Once the lines, the communication wire (the 14/4 SOOW cable), and the drain are secured, snap the covers on. Use the joint covers and end caps to finish the look. It should look like a piece of architectural trim, not an afterthought. I’ve seen guys use duct tape to hold these together—don’t be that guy. If it doesn’t snap, something is crowded. Rearrange your lines.
“Airflow is the lifeblood of the system, but the line set is the nervous system. Protect it or prepare for a stroke.” – ASHRAE Standard 15 (Paraphrased)
The Physics of the ‘Monsoon Effect’ and Cold Zones
In the North, we deal with extreme temperature swings. The plastic of the line set cover will expand and contract. If you butt the joints too tight, the cover will buckle in the summer. Give it an eighth of an inch of breathing room. More importantly, ensure the top ‘entry’ fitting is flashed correctly. I’ve seen ice dams form inside line set covers because a tech didn’t flash the top wall entry. That ice then crushes the insulation, and suddenly your ‘high-efficiency’ mini-split is running at the efficiency of a window unit from 1985.
Final Verdict: Don’t Be a Parts Changer
The difference between a Master Tech and a ‘Parts Changer’ is the attention to the ‘invisible’ physics. Anyone can hook up two wires and a flare nut. But understanding that the line set cover is a thermodynamic shield is what keeps a system running for thirty years instead of ten. When you do a mini-split installation, you aren’t just selling a box; you are selling a specific delta-T (temperature difference) and a specific humidity removal rate. You cannot maintain those numbers if your lines are baking in the sun or vibrating against bare plastic. Do it right, seal it with pookie, and tell that Sales Tech to keep his $15,000 ‘scam-pacitors’ to himself.