It was a sweltering summer evening when I finally realized my old window AC unit just couldn’t keep up anymore. The relentless heat had me sweating through the night, tossing and turning, thinking, “There has to be a better way.” That lightbulb moment led me down the path of exploring mini-split systems, and let me tell you—it’s been a game-changer. If you’ve ever felt trapped by uneven temperatures or inefficient cooling and heating, you’re not alone. Today, I promise to share how mini-split systems can revolutionize your home’s comfort, making it a cozy retreat year-round.
Why Home Comfort Should Be a Top Priority Right Now
In today’s world, where so much of our time is spent at home, having a reliable and efficient climate control system isn’t just a luxury—it’s essential. The truth is, traditional HVAC setups often fall short, especially in homes with inconsistent insulation or rooms that are hard to cool or heat evenly. I learned this firsthand when I realized my living room was always freezing while my kitchen felt like a sauna.
Investing in a mini-split system transformed my living space, providing zoned comfort without the hefty energy bills or intrusive ductwork. Plus, as professionals note, ductless systems can be more energy-efficient, potentially reducing your utility costs significantly. According to studies, improper duct sealing can lead to up to 30% energy loss, which makes ductless solutions like mini-splits a smart choice for modern homeowners.
Are you tired of battling with one-size-fits-all heating and cooling? Have you faced the frustration of uneven temperatures or rising energy bills? If so, you’re not alone, and there is a solution that might just change everything for you.
Is Mini-Split Technology Really Worth the Hype?
Early in my journey, I made the mistake of assuming that adding a mini-split was just another gadget fad. But after a bit of research, I discovered that these systems are backed by proven technology and are tailored to meet real needs. One thing I wish I had known sooner is how crucial proper installation is—an error I made initially, which impacted performance and comfort. To avoid similar pitfalls, it’s a good idea to consult trustworthy sources and professionals, such as those at Climate Master, who offer expert [mini-split installation strategies](https://climatemasterzhvac.com/trustworthy-mini-split-ac-installation-strategies-for-lasting-comfort).
In the upcoming sections, I’ll walk you through the key benefits of mini-split solutions, how to choose the right system, and practical tips to ensure your investment pays off. Trust me; making an informed decision now can save you from future headaches and keep your home comfortably inviting throughout the year.
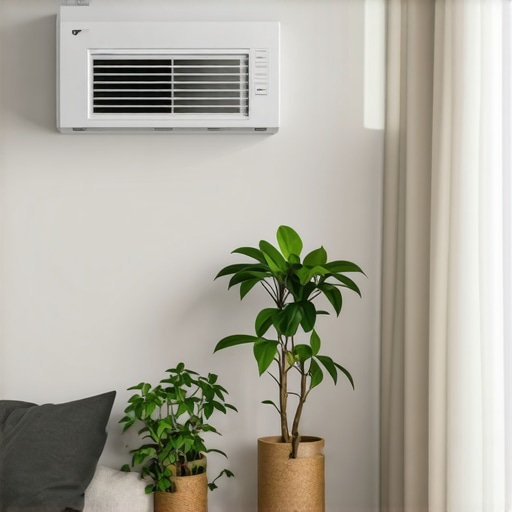
Prepare Your Space for Mini-Split Installation
Begin by assessing where you want to install your mini-split to maximize efficiency. Choose an interior wall that allows for unobstructed airflow and proximity to an outdoor unit. Remove any obstructions like shelves or furniture that could impede the unit’s operation. Using a level, mark the mounting points, ensuring the unit will sit level for optimal performance. During my first installation attempt, I skipped this step and the unit hung unevenly, causing vibrations and noise, which I resolved by realigning it carefully. For detailed guidance, consult trusted mini-split installation strategies to avoid common pitfalls.
Cutting and Preparing the Wall
Next, you’ll need to drill a hole through the wall for the conduit and refrigerant lines. Use a drill with a hole saw attachment to make a clean, sufficient-sized opening—typically 3-4 inches in diameter. Check for any electrical wires or pipes behind the wall before drilling to prevent hazards. When I drilled my first hole, I accidentally hit a hidden pipe, which led to a minor water leak—lesson learned by double-checking behind walls beforehand. For expert advice on this process, review mini-split ductless system tips.
Mounting the Indoor Unit Securely
Attach the mounting bracket to the wall using the markings you made earlier, ensuring it is level and firmly anchored with appropriate wall anchors or screws. Then, hang the indoor unit onto the bracket, making sure it clicks into place securely. Proper mounting prevents vibrations, noise, and performance issues. During my install, I found that using a spirit level while mounting saved me from future instability, which could have caused rattling and poor airflow. Pay attention to the unit’s clearances for maintenance and airflow—usually a few inches around the top and sides. For comprehensive mounting techniques, see mini-split installation strategies.
Connecting Refrigerant Lines and Wiring
Connect the refrigerant lines to the indoor unit, ensuring a tight and secure fit to prevent leaks. Use flare nuts and a suitable wrench for tightening; over-tightening can damage fittings. Next, connect the electrical wiring, following the manufacturer’s wiring diagram precisely. Proper wiring is crucial for safety and efficiency. During my first attempt, I made a wiring mistake that caused the unit not to operate; I corrected it by cross-referencing the installation manual and consulting an electrician. Consult trusted HVAC wiring tips to avoid hazards.
Sealing the Wall and Final Checks
Seal around the conduit with weatherproof insulation or caulk to prevent air leaks and pests. Test the system by turning it on, checking for refrigerant leaks, unusual noises, or error codes. Measure the airflow to confirm the indoor unit functions correctly. In my experience, running the system for a few hours initially helps identify issues early. If any problems arise, consulting trusted mini-split expert tips can save you time and expense. Proper setup ensures efficient operation and long-term reliability, keeping your home comfortable through every season.Many homeowners assume that installing an AC system or mini-split is just about plugging in a unit and turning it on. However, even experienced professionals often overlook subtle yet critical details that can impact long-term performance and energy efficiency. One common myth is that a perfect system is achieved solely through correct sizing, but in reality, accurate load calculations that account for insulation, shading, and airflow are equally vital. According to HVAC expert opinions, neglecting these factors can lead to oversized or undersized units, resulting in frequent cycling or inadequate cooling, which reduces lifespan and increases utility bills.
Why do so many systems fail prematurely despite professional installation?
It boils down to overlooking nuances like proper refrigerant charge, precise duct sealing, and correct airflow balancing—mistakes that often seem minor but have significant repercussions. For instance, an improper refrigerant level not only hampers cooling capacity but can also cause compressor failure, as detailed in studies published by the Air Conditioning, Heating, and Refrigeration Institute. Moreover, many assume that duct sealing isn’t necessary with ductless mini-splits, yet even these systems benefit from optimized internal airflow to maximize efficiency and comfort.
An often-ignored aspect of installation is testing and commissioning. Ensuring all components operate within manufacturer specifications and that controls are calibrated correctly can prevent future breakdowns. Skipping this step might save time upfront but leads to costly fixes and reduced energy savings later. Remember, reliability stems from attention to detail during installation, not just hardwiring the unit. For detailed guidance, see trusted strategies for lasting comfort.
Additionally, advanced technicians understand the significance of environmental factors. For example, selecting the optimal outdoor location for the condenser—avoiding direct sunlight or high-wind areas—can dramatically improve efficiency and reduce wear. Many underestimate how external conditions influence system responsiveness. They’re often tempted to place units in convenient spots rather than the best-suited locations, leading to increased energy consumption and reduced lifespan.
Have you ever fallen into this trap? Let me know in the comments. As you can see, mastery in AC and mini-split installation goes beyond basic knowledge. It involves a nuanced understanding of airflow, refrigerant management, environmental considerations, and thorough testing. When these elements are handled with expertise, your system will not only perform better but also last longer and save you money. For comprehensive tips on maintaining reliable heating and cooling, check out trusted HVAC tips. Remember, being aware of these subtleties makes all the difference between a system that just works and one that delivers optimal performance for years to come.
How do I keep my HVAC system in top shape for the long haul?
Maintaining your heating and cooling systems isn’t just about routine checks; it requires the right tools and a bit of know-how. From specialized equipment to software that streamlines diagnostics, I rely on a set of proven tools that ensure my system runs efficiently year after year.
Invest in a Digital Refrigerant Gauge
This might sound technical, but a high-quality digital refrigerant gauge is invaluable. I personally use the Testo 550 digital manifold, which provides precise readings of pressure and refrigerant levels. Correct refrigerant charge prevents compressor strain, extends system lifespan, and ensures optimal cooling or heating. Accurate readings help me avoid the common mistake of undercharging or overcharging, which can lead to early system failure. Check out the detailed guidance from trusted HVAC tips for more about refrigerant management.
Use a Digital Multimeter for Electrical Checks
A reliable multimeter is crucial for diagnosing electrical faults. I prefer the Fluke 115 for its durability and precision, which allows me to verify voltage, resistance, and continuity during inspections. This tool helps me catch wiring issues or faulty components before they escalate into breakdowns. Ensuring proper electrical connections aligns with best practices in furnace repair standards.
Incorporate Smart Thermostats and Monitoring Apps
Smart thermostats like the Nest Learning Thermostat or Ecobee not only optimize energy usage but also provide remote diagnostics. I regularly monitor system performance and receive alerts for potential issues, allowing for proactive maintenance. These apps integrate with my workflow, making it easier to track long-term results and adjust settings for maximum efficiency. As technology advances, expect these tools to become even more integrated with predictive analytics, as highlighted in industry trend reports.
Prioritize System Cleaning and Filter Checks
While tools are essential, don’t forget manual maintenance. I keep a set of microfiber cloths, coil cleaners, and filter scrapers handy. Regular cleaning of coils, filters, and vents prevents dirt buildup, maintaining airflow and system efficiency. Using a vacuum with a brush attachment, I inspect blower motors and ductwork for obstructions, ensuring everything operates smoothly. Simple tools like these save money and extend equipment lifespan.
Plan for Future Success by Scaling Up
The HVAC landscape is moving towards more integrated, energy-efficient solutions. I predict that AI-powered diagnostics and IoT sensors will become standard, helping homeowners catch issues early and optimize performance remotely. Investing now in smart tools prepares you for this evolution. For comprehensive upgrading strategies, explore expert advice on system upgrades.
Remember, using these precise tools not only helps in quick troubleshooting but also prolongs the life of your system. I encourage you to try incorporating a digital refrigerant gauge into your maintenance routine—it’s a game-changer. Mastering these tools empowers you to maintain your system effectively, saving time and money in the long run.
,
What I Wish I Knew Before Starting My Mini-Split Journey
One thing I learned early on is that even small details—like choosing the right location for the outdoor unit—drastically impact efficiency and lifespan. I once placed mine in direct sunlight, which caused overheating and extra energy consumption. That lightbulb moment taught me to research environmental factors deeply, as recommended in trusted furnace repair and HVAC guides. Another lesson was that precise refrigerant charging isn’t just a myth; it’s vital for long-term reliability. When I neglected this, my system underperformed, prompting costly fixes. Speaking from experience, consulting professional strategies in mini-split installation strategies saved me from potential failures.
Tools and Resources That Transformed My Approach
Investing in a digital refrigerant gauge, like the Testo 550, proved to be a game-changer. It helped me avoid common mistakes like undercharging or overcharging, both of which can damage components. For electrical troubleshooting, a reliable multimeter—my favorite being the Fluke 115—ensured I caught wiring issues early, saving time and money. I also rely on smart thermostats like Ecobee, which integrate effortlessly with monitoring apps, giving me peace of mind even when away. For comprehensive guidance, trusted HVAC tips on maintenance and diagnostics are invaluable resources.
Embracing the Future of Home Comfort with Confidence
Now, armed with personal insights and trusted tools, I encourage you to take the leap. Proper installation and maintenance of mini-splits don’t have to be daunting when you know where to focus. Your home’s comfort—and your peace of mind—depends on your willingness to learn and adapt. Remember, each small improvement can lead to significant long-term gains. So, are you ready to transform your space and embrace smarter, more efficient climate control? Share your experiences or questions below—I love hearing how others are making their homes more comfortable.