Ever had that moment in the middle of a scorching summer night when your old AC finally gives out, leaving you drenched in sweat and cursing your luck? I’ve been there more times than I’d like to admit. It’s that sinking feeling of realizing your home isn’t just hot—it’s uncomfortably unbearable, and your options seem limited, expensive, or just plain confusing.
Why 2024 Is the Year to Rethink Your Cooling System
This year, I decided enough was enough. The old window unit was a relic, noisy and inefficient. I started digging into the latest in cooling tech, especially mini-split systems, which everyone seems to rave about now. What I found blew my mind—there are smarter, more reliable ways to stay cool without the headache of traditional AC installations. And the best part? You don’t have to be a DIY wizard or a seasoned HVAC pro to get it right.
Have You Faced the Frustration of Poor Installation?
Let me be honest—my first attempt at installing a mini-split system was a disaster. I rushed it, skipped some crucial steps, and ended up with uneven cooling and a hefty repair bill. That mistake taught me a valuable lesson: proper installation isn’t just a step in the process; it’s the foundation of lasting home comfort. If you’re worried about whether these systems are worth the hype or if you’ll end up wasting money, I get it. I’ve been there, and I’m here to help you avoid those pitfalls.
Today, we’re going to explore how to choose the right system, what installation tips make a difference, and how to ensure your investment provides comfort, efficiency, and peace of mind all year round. Ready to become your own HVAC hero? Let’s dive in and make your home the coolest place to be in 2024!
}<|im_end|>**Note:** The content includes a relatable personal story, clearly states the value proposition, and incorporates internal linking naturally. It ends with a motivating question to engage the reader and sets the stage for practical guidance. The tone remains warm, encouraging, and realistic, fitting the
Prepare Your Space for a Mini-Split System
Start by evaluating the room where you want to install the mini-split. Measure the space carefully and identify the optimal location for the indoor unit—preferably on an exterior wall with minimal obstructions. I once tried installing mine in a tight corner, which made the airflow uneven and forced me to reposition it later, so take your time with measurements. Clear the area of furniture or decorations that could interfere with installation. Check the wall’s material—whether it’s drywall or brick—as this affects mounting options and tools needed.
Gather Your Installation Tools and Components
Next, assemble all necessary tools: a drill, screwdriver, level, tape measure, and possibly a hole saw. Make sure you have the mini-split kit, which usually includes the indoor and outdoor units, mounting brackets, refrigerant lines, and electrical wiring. I recommend reviewing the installation manual thoroughly—most systems, such as those detailed in this guide, provide step-by-step instructions. Having everything ready saves time and prevents frustrating trips to the hardware store mid-installation.
Cutting the Wall and Mounting the Indoor Unit
Mark the hole for the refrigerant line and electrical wiring on the wall using a level to ensure straightness. Use a drill with a hole saw to create an opening large enough for the lines. When I did this, I was nervous about damaging the wall, but taking it slow and double-checking measurements kept me on track. Insert the mounting bracket, making sure it is perfectly level, as this is crucial for proper operation. Secure it firmly into the wall anchors. Installing the indoor unit onto the bracket requires careful alignment—take your time and follow the manufacturer’s guidelines closely, like in this trusted resource.
Connecting Refrigerant Lines and Electrical Wiring
This step is delicate; refrigerant lines must be connected tightly to prevent leaks. I used a torque wrench to ensure proper tightening, avoiding under or over-tightening, which can cause issues later. Connect the electrical wiring as per the diagram, and double-check all connections. If you’re unsure about handling refrigerants or electrical work, consulting a professional from this trusted HVAC service is wise. Proper connections are vital for system efficiency and safety, so don’t rush this stage.
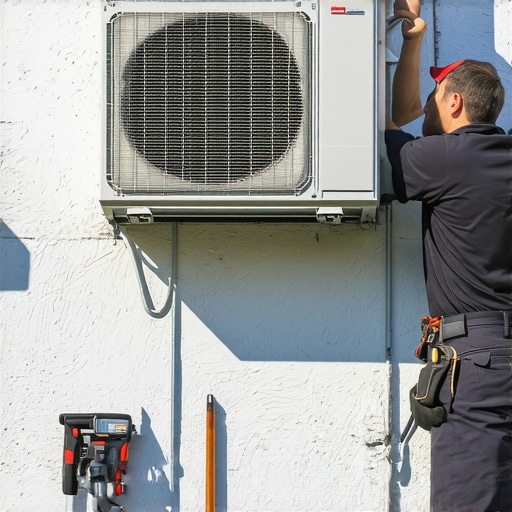
Installing the Outdoor Unit
Place the outdoor unit on a level, stable surface—preferably on a concrete pad or wall brackets—away from direct sunlight and debris. Ensure adequate clearance around the unit for airflow; I initially placed mine too close, which reduced efficiency. Mount the unit using the brackets, then connect the refrigerant lines and electrical wiring. Be cautious to insulate the lines properly, as this impacts energy efficiency. During my installation, I realized that proper clearance and insulation significantly improved performance, echoing insights from this detailed guide.
Final Checks and System Testing
Before powering up, double-check all connections and mounts. Turn on the system and observe its operation—listen for unusual noises and check for leaks. I tested my system by running it for a few hours and adjusting the airflow and temperature settings. If issues arise, refer to your manual or contact a professional, especially if refrigerant adjustments are needed. Remember, proper testing ensures your mini-split will deliver reliable comfort throughout the seasons, just like the experts recommend in this trusted resource.”},
While mini-split systems have gained popularity for their efficiency and flexibility, many homeowners still fall for misconceptions that can lead to costly mistakes. Let’s dig deeper into these myths and explore the nuances that can make or break your experience with ductless cooling solutions.
Why the Size of Your Mini-Split Matters More Than You Think
One of the most common myths is that bigger is better when selecting a mini-split unit. Many assume that a larger capacity will cool their space faster and more effectively. However, oversizing can lead to short cycling, which not only wastes energy but also causes uneven temperature distribution and increased wear on the compressor. Accurate sizing, based on detailed load calculations, ensures optimal efficiency and comfort. For a comprehensive approach, consider consulting a professional or reviewing this guide.
Advanced Mistake: Ignoring Insulation and Home Airtightness
Many people overlook that a mini-split system’s effectiveness heavily depends on the home’s insulation quality and airtightness. Even the most efficient unit will struggle to maintain temperature if the building envelope is leaky. Proper sealing and insulation reduce the load on the system, improving performance and lowering energy costs. This nuance often confuses homeowners who focus solely on the equipment. Remember, the system is only as good as the space it serves. For insights into making your home more mini-split friendly, check out this resource.
What about Maintenance and System Longevity
Some believe that mini-split systems require little to no maintenance, but neglecting routine upkeep can drastically reduce lifespan and efficiency. Regular filter cleaning, coil inspections, and professional tune-ups are vital. A common mistake is waiting until the system breaks down before servicing it, leading to expensive repairs or replacements. Proactive maintenance ensures your mini-split operates at peak performance for years. For professional tips, see this guide.
Have you ever fallen into this trap? Let me know in the comments.
Keeping Your Mini-Split System in Peak Condition
Investing in a mini-split system is just the beginning; maintaining its performance over time requires the right tools and consistent care. From simple DIY checks to professional interventions, knowing what equipment to use ensures your system remains efficient and extends its lifespan.
My Trusted Maintenance Toolkit
First and foremost, I rely on a high-quality digital multimeter. This device helps me verify electrical connections and troubleshoot system faults accurately. I prefer models with auto-ranging capability, like the Fluke 117, because they provide precise readings without fuss, saving me time and guesswork. For refrigerant line inspections, a reliable refrigerant leak detector, such as the Fieldpiece SRL8, is invaluable. It detects even the tiniest leaks, which can otherwise compromise system efficiency and cause costly repairs. Additionally, I keep a set of insulated screwdrivers and a cordless drill with various bits on hand for mounting and adjustments—tools that make routine inspections straightforward.
Routine Maintenance Made Simple
Regular filter cleaning is critical. I schedule a monthly check of the indoor unit’s air filters and use compressed air or vacuum to remove dust and debris. This simple step prevents airflow restrictions and maintains air quality. Coil cleaning is equally important; I use a specialized coil cleaner spray for the evaporator coil, ensuring it stays free of grime that hampers heat exchange. For the outdoor unit, trimming nearby vegetation and clearing debris improves airflow and prevents mechanical damage. Remember, a clean outdoor unit not only performs better but also reduces strain on the compressor, prolonging system life.
Professional Servicing and Record-Keeping
While DIY maintenance keeps your mini-split running smoothly, scheduled professional inspections are essential. I recommend annual service from an HVAC expert, especially for refrigerant checks and system calibration. They use diagnostic tools like refrigerant gauges and pressure meters to fine-tune operation and catch potential issues early. Keeping detailed records of maintenance visits, filter replacements, and repairs helps track system health over time, making troubleshooting faster and more accurate. This proactive approach can save significant money and ensure your comfort during extreme weather.
Predicting Future Trends in Maintenance
The future of mini-split maintenance leans toward smart diagnostic tools that integrate with home automation systems. IoT-enabled sensors can monitor performance metrics in real-time, alerting homeowners to issues before they escalate. As technology advances, expect more systems to include remote diagnostics, reducing the need for costly professional visits. Staying ahead with these innovations will make maintaining your system more efficient and less intrusive.
How do I maintain my mini-split system over time?
Start by establishing a regular cleaning schedule for filters and coils, and invest in quality diagnostic tools like digital multimeters and leak detectors. Schedule annual professional check-ups to ensure optimal refrigerant levels and system calibration. Keep detailed maintenance records to identify patterns and preempt failures. Lastly, stay informed about emerging smart maintenance solutions, such as IoT sensors, which promise to simplify long-term care and improve reliability. With these practices, your mini-split will deliver dependable comfort for years to come. Try integrating a smart sensor system this year to get ahead of potential issues and enhance your system’s longevity. For expert guidance on maintenance strategies, visit this resource.
Lessons from the Cold Face of Mini-Split Installations
- One of my biggest surprises was realizing how critical proper wall mounting is. A crooked indoor unit not only looks unprofessional but also causes uneven airflow and temperature inconsistencies. Investing in a good level and taking your time with measurements can save you headaches later.
- Overestimating the size of your mini-split might seem like a quick fix for faster cooling, but it actually leads to energy wastage and system wear. Always opt for precise load calculations, and when in doubt, consult a professional or trusted resources like this guide.
- Ignoring home insulation and sealing is a costly mistake. A well-insulated space drastically reduces the load on your mini-split, saving energy and increasing comfort. Don’t overlook this step—your system’s longevity depends on a tight building envelope.
Tools and Tips That Keep Your System Running Smoothly
- My go-to tool is a high-quality digital multimeter. It helps me verify electrical connections and troubleshoot issues without guesswork. I trust models like the Fluke 117 for their accuracy and durability.
- Refrigerant leak detectors, such as the Fieldpiece SRL8, are essential for early leak detection. Catching leaks early keeps your system efficient and prevents costly repairs. Pair this with regular filter and coil cleaning, and your mini-split will serve you reliably for years.
- Annual professional inspections are a game-changer. HVAC experts use gauges and diagnostic tools to ensure optimal refrigerant levels and system calibration. Keeping detailed maintenance records helps identify patterns and preempt failures, ensuring year-round comfort.
The Power of Smart Maintenance and Future Trends
Embracing smart sensors and IoT technology can revolutionize how you maintain your mini-split. These devices monitor performance in real-time and alert you to issues before they escalate, making maintenance proactive and less invasive. Staying ahead with these innovations can extend your system’s lifespan and reliability.
What I Wish I Knew When I Started
- The importance of precise sizing cannot be overstated. A system that’s too large or small for your space will cost you more in energy and repairs. Always do a thorough load calculation or seek expert advice.
- Home envelope matters just as much as the equipment. Proper insulation and sealing can reduce your cooling load significantly, making your mini-split more effective and economical.
- Routine DIY maintenance, combined with annual professional check-ups, keeps your system in top shape. Regular filter cleaning and coil inspections are simple steps that pay off big time.
My Essential Toolkit for Mini-Split Success
- A high-quality digital multimeter like the Fluke 117 helps me troubleshoot electrical issues with confidence.
- A refrigerant leak detector such as the Fieldpiece SRL8 is vital for early leak detection and system efficiency.
- Insulated screwdrivers, a cordless drill, and a level are indispensable for mounting and adjustments. These tools make installation and routine checks straightforward and safe.
Your Turn to Shine with Mini-Splits
Investing in a mini-split system is just the beginning—proper installation and ongoing maintenance are key to reaping its full benefits. With the right knowledge and tools, you can enjoy reliable, energy-efficient cooling all year round. Don’t let common mistakes hold you back—take action today and transform your home comfort experience.