The Sound of a Silent Killer: Identifying Flare Failures
I remember my old mentor, a grizzly guy who’d spent more time in 140-degree attics than in his own living room, used to grab me by the collar and scream, ‘You can’t cool what you can’t touch!’ He wasn’t talking about the air itself; he was talking about the physics of the evaporator coil. If the juice—that’s refrigerant for the uninitiated—isn’t contained within the copper, the whole system is just a high-priced fan. Today, I’m seeing more mini-split installs than ever, and frankly, most of them are ticking time bombs because of one tiny, misunderstood piece of geometry: the flare connection. If you’re a homeowner or a green tech, you need to understand that a mini-split isn’t like a traditional AC installation where we braze everything with a torch. These systems rely on mechanical pressure. If that flare is even a fraction of a millimeter off, you aren’t just losing cooling; you’re inviting a slow-motion mechanical heart attack into your home.
“Refrigerant piping shall be installed in a manner that does not introduce undue stress on the joints and must be tested for tightness before being placed into service.” – ASHRAE Standard 15
Thermodynamic Zooming: Why Pressure Matters
Let’s talk about the science of the ‘leak.’ When we talk about heating service or cooling, we’re really talking about moving heat. Inside that copper line, the refrigerant is under immense pressure—often exceeding 400 PSI on an R-410A system. When a flare is improperly seated, it creates a microscopic orifice. As the juice escapes, it undergoes a rapid pressure drop. This is the Joule-Thomson effect in action. The temperature at that specific leak point can plummet, often causing localized condensation or even ice. But here’s the kicker in a humid climate: that condensation mixes with the POE oil that’s naturally carried by the refrigerant. What you get isn’t just a wet spot; it’s an oily, dust-attracting sludge that is the first physical sign of a disaster. In high-humidity zones like the Gulf Coast, this moisture can actually accelerate the corrosion of the flare nut itself if it’s a cheap, thin-walled piece of junk.
The Anatomy of a Bad Flare: What to Look For
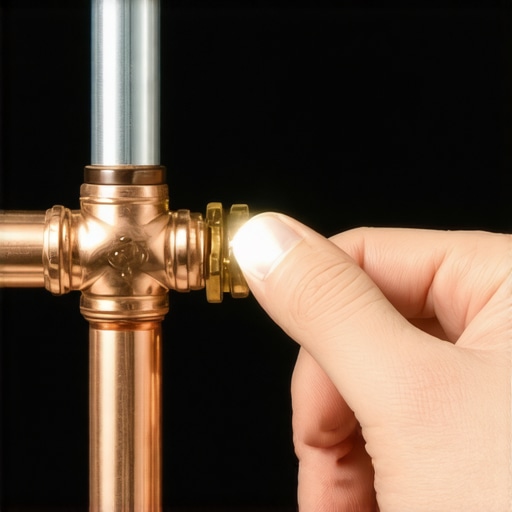
Before you call for a furnace repair or a full system replacement, look at your indoor head unit’s connection points. First, look for ‘The Oily Smudge.’ Refrigerant is a gas at room pressure, but the oil it carries is a liquid. If you see a dark, greasy ring around the brass nut where the copper meets the unit, you’ve got a leak. It’s not ‘sweat’ from the humidity; it’s the lifeblood of your compressor escaping. Second, listen for the ‘Micro-Hiss.’ In a quiet room, a failing flare connection sounds like a tiny snake. This is the sound of your efficiency evaporating. If the Sparky who did the electrical didn’t give the HVAC tech enough room to work, or if a Tin Knocker bumped the lines during ductwork, that flare could be under ‘side-load’ stress, meaning it’s being pulled at an angle.
“Proper flare connection requires a smooth, burr-free surface to ensure a gas-tight metal-to-metal seal.” – ACCA Manual J / Manufacturer Standards
The Physics of the ‘Cold Swamp’ Effect
In humid regions, an improperly flared connection leads to a specific kind of misery. As the refrigerant level drops, the evaporator coil’s temperature doesn’t just stay steady; it fluctuates wildly. The coil might drop below the dew point too quickly, but because there isn’t enough mass (refrigerant) to carry the heat away, it can’t effectively dehumidify. You end up with what I call the ‘Cold Swamp.’ The air coming out of the vents is 60 degrees, but the humidity in the room is still 75%. You’re cold, but you’re clammy. This ‘latent heat’ isn’t being removed because the system’s thermodynamics are broken. A ‘Sales Tech’ will tell you the compressor is shot and try to sell you a $12,000 unit. A real tech will find the oily flare, cut it off, deburr the copper properly, and pull a vacuum to 500 microns after a nitrogen pressure test.
The Tool is the Truth: Avoiding the Scam
Why do these flares fail? It’s usually because of a cheap flaring tool. A standard plumbing flare tool is 45 degrees, but HVAC flares need to be exactly 45 degrees with an eccentric motion to burnish the copper. If the tech didn’t use a torque wrench, they either under-tightened it (causing a leak) or over-tightened it (crushing the copper until it cracks). This is why I tell people that the most important part of an AC installation isn’t the brand on the box—it’s the hands on the tools. If you see a tech reach for a pair of adjustable wrenches instead of a calibrated torque wrench and a bit of Nylog (refrigerant-grade sealant), you’re looking at a future leak. Don’t let them tell you they ‘have the feel’ for it. Physics doesn’t care about your feelings; it cares about foot-pounds of torque.
Summary of Maintenance vs. Repair
If you catch a bad flare early, the fix is relatively cheap: a few hundred bucks for a pump-down, a re-flare, and a recharge. If you wait until the compressor burns out because it’s been running ‘dry’ without oil, you’re looking at a total system loss. The acidic smell of a burnt-out compressor is something you never forget—it smells like failure and wasted money. Keep your eyes on those connections, watch for the oil, and never trust a tech who doesn’t own a vacuum gauge. Real HVAC work is about the invisible details, not the shiny white plastic on the wall.