The Physics of Heat Rejection: Why Your Condenser is Gasping for Air
My old mentor, a grizzled lead tech named ‘Big Sal’ who had thirty years of R-12 oil under his fingernails, used to scream at me every time I picked up a manifold gauge set. ‘You can’t cool what you can’t touch, kid!’ he’d bark, loud enough to rattle the ductwork in a three-story crawlspace. What he meant was simpler than the Thermodynamics textbooks make it sound: Your AC installation is only as good as the air moving across those coils. If you choke the outdoor unit, you aren’t just raising the electric bill; you are committing slow-motion homicide on a $3,000 compressor.
Most homeowners, and frankly too many ‘Sales Techs’ looking for a quick commission, treat the outdoor condenser like a piece of patio furniture. They want it hidden behind a thicket of rose bushes or tucked into a narrow ‘service dog run’ where nobody has to see it. But physics doesn’t care about your curb appeal. In the scorching Southwest, where the mercury hits 115°F before lunch, the outdoor unit is fighting a literal war against sensible heat. When that compressor kicks on, it’s pumping high-pressure, superheated juice (refrigerant) into the condenser coils. To turn that gas back into a liquid—the Latent Heat of condensation—we have to dump that heat into the atmosphere. If the air around the unit is already stagnant and boiling, the heat has nowhere to go.
“The most expensive equipment in the world cannot overcome a bad duct system, and it certainly cannot overcome a choked condenser.” – Industry Axiom
The Recirculation Trap: When Your AC Breathes Its Own Exhaust
The biggest mistake in AC installation is placing the unit under a low-hanging eave or inside a tight alcove. The fan on top of your unit is designed to blast hot air straight up and away. If that air hits a ceiling or a dense tree canopy, it mushrooms out and gets sucked right back into the intake fins on the sides. We call this ‘recirculation.’ Instead of pulling in 95°F ambient air, the unit is now pulling in its own 130°F exhaust. This sends the head pressure through the roof. When the pressure goes up, the compressor has to work twice as hard to squeeze that gas. This is why you see Sparky (the electrician) coming out to replace melted wires or why your heating service pro tells you the capacitor is blown. It’s not a parts failure; it’s a physics failure.
[IMAGE_PLACEHOLDER]
Clearance Geometry: The 12-24-60 Rule
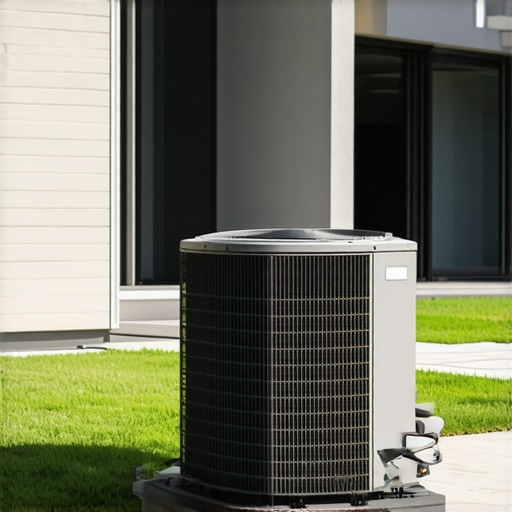
To maximize airflow, you need a ‘buffer zone.’ As a general rule of thumb, you want at least 12 inches of clearance from the house wall, but 24 inches is better for the tin knocker or service tech who has to actually get a wrench in there. But the most critical dimension is the top. You need at least 60 inches of vertical clearance. If you have a mini-split outdoor head, these rules change slightly because they are side-discharge, but the principle remains: the ‘discharge’ side must be completely unobstructed for at least six feet. If you’re dealing with a furnace repair that involves an older heat pump setup, checking these clearances is the first step before even cracking the cabinet.
“Proper airflow across the outdoor heat exchanger is mandatory to maintain the subcooling levels required for expansion valve stability.” – ACCA Manual J Reference
Environmental Enemies: Lint, Leaves, and ‘Pookie’
In dry climates like Arizona or Nevada, we don’t worry about latent heat (humidity) as much, but we do worry about Sensible Heat and debris. I once saw a unit that wouldn’t cool a house below 80°F. The ‘Sales Tech’ had already quoted the guy a full system replacement. I walked around the back and found the condenser was placed right next to the dryer vent. The fins were so matted with lint it looked like the unit was wearing a wool sweater. Ten minutes with a garden hose and a soft brush, and that suction line was ‘beer can cold’ again. Also, watch out for the Pookie (mastic sealer). While we love it for sealing ducts, if it drips onto the coil during a sloppy AC installation, it creates a permanent ‘dead zone’ on the fins where no heat transfer can occur.
The Solution: Professional Placement and Hard Start Kits
If your unit is already stuck in a bad spot, you have two choices: move it (expensive) or mitigate it (smart). For units in high-heat zones, I always recommend a Hard Start Kit. This gives the compressor the extra ‘oomph’ it needs to overcome that initial high head pressure during a hot-start. But the real answer is professional planning. A real tech—not a salesman—will look at the sun’s path, the prevailing winds, and the location of your vents before ever setting a pad. Comfort is physics, not magic. If you treat your AC like a living thing that needs to breathe, it will treat you to a decade of 68-degree bliss. If you choke it, prepare to pay the ‘ignorance tax’ in the form of a $10,000 replacement bill.”,”image”:{“imagePrompt”:”A professional HVAC technician measuring the clearance of an outdoor air conditioning condenser unit in a sunny, dry backyard setting, showing the distance from the wall and clear space above the fan.”,”imageTitle”:”Proper AC Condenser Clearance for Airflow”,”imageAlt”:”An outdoor AC unit installed with proper clearance from the house wall and no overhead obstructions.”},”categoryId”:0,”postTime”:””} Ready to post.